DAY 1 - Clipper work
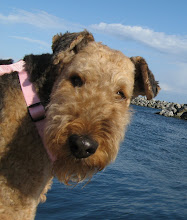
Are these the looks of a happy girl??

 NOOOOOO of course not!!!
Why? Well because I would rather be playing at the park or swimming in the ocean than being GROOMED!!! However, I grow a profuse amount of coat at an alarming rate, so I need to be groomed every 6-8 weeks or I get too hot. Let me tell ya, a good diet makes your coat and nails grow super fast ..... so if you dislike grooming as much as I do, I suggest you don't eat MY DIET !!
I was specially pouty today since it had only been 5.25 weeks from the time I was last groomed. My EVIL mum, however, decided today was a good day for grooming because it wasn't raining........ hello?? shouldn't we be at the beach since it's nice out??
Mum got out her grooming tool kit that included the following:

- Oster Golden A5 Clipper : clipper work
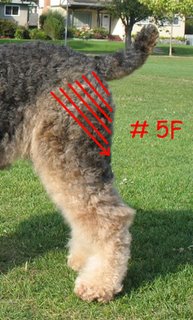
- # 5F blade : body, shoulders, chest, top of head, thighs
- # 10 blade : cheek, ears (outside), under belly, inner thighs
- # 30 blade : pads, ears (inside)
- Comb
- Slicker brush
- Nail Dremel : shortening nails
- Straight shears
- Thinning shears
Because my coat wasn't very dirty today, mum decided to do most of the clipper work before bathing me. This way, she wouldn't be wasting her time washing all that hair that was coming off anyway. Keep in mind that a dirty coat can dull the blades and shears very fast, so if you are a dirty pup, it is better to let your mum bath you before doing any clipping or scissoring.
I was thoroughly brushed and combed before any clippering was done. Mum started out by using the # 5F blade from behind my ears, and worked her way down the bulk of the body, and down my back:

A # 7F or number # 10 blade can also be use for the body work depending how short you want the hair to be. The smaller the blade size get, the longer it leaves the hair. Mum likes to see a little bit of "curls" on me, so she uses a # 5F.
Then she ran the clipper off my hip, over my thigh at a 45 degree angle, and stopping half way between the hip joint and the hock. The rest of the hind leg furnishings were left to be bathed and scissored next day:
And it looked like this:

I was then clipped down my hind legs from behind with the # 5F blade, stopping just above the hock. Mum used a # 10 blade to trim around my pee pee/poo poo areas to keep the hair short for obvious reasons.

This is what my hind end looked like afterwards. Again, the rest of the furnishings will be scissored after the bath:

The # 5F blade was again used down the shoulders stopping at the elbows, underside of the neck, down the chest, stopping just above the chest bone. From the chest bone, mum made an upside down V to either side of the leg, leaving a tuft of V shaped hair in between. It looked like this:

The furnishings on my front legs will be scissored tomorrow since the shears only work on an absolute clean coat.
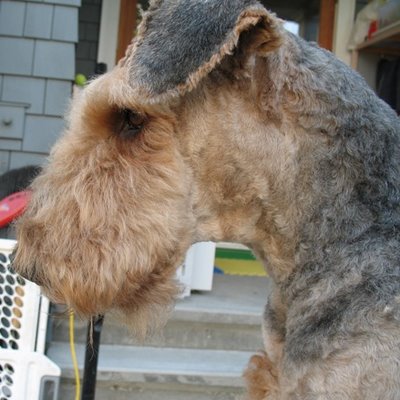
With the head, mum used # 5F on top of the head starting just above the eye sockets, and then #10 on the ears. Mum just prefers to have a little more hair on top of the head so she uses a # 5F, most people just use one size blade for the entire head/cheeks/ears (usually size # 10 or # 7F).

The edges of my ears are ragged right now, but will be neatly trimmed with scissors tomorrow. This is what I looked like after the hair came off my my head and my ears:

To the sides of the face, my cheeks were clipped with a # 10 blade. Mum ran a diagonal line from the corner of the eye down to the corner of the upper lip:

This is after the cheek hair was taken off:

The rest of the facial hair will be scissored and blended in after the bath.
Face from the other side:
Lastly, the hair in between my pads were clipped off with a # 30 blade, and my belly was done with a # 10 blade:

Clipped:
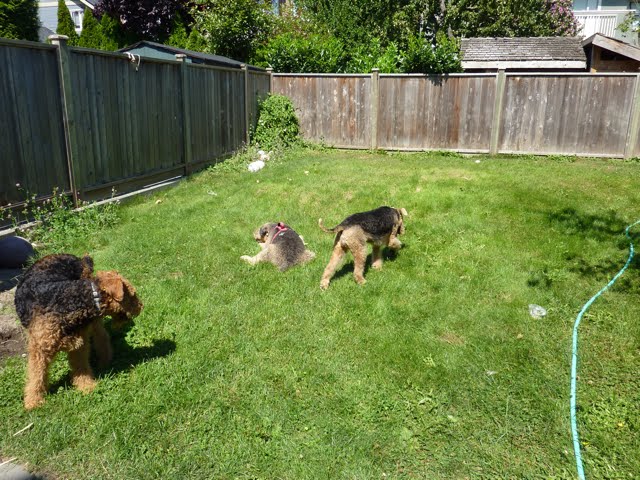
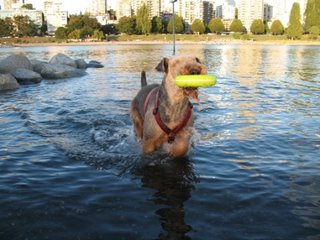
Then it was BEACH TIME!!!! I was such a good girl throughout all that clippering that mum decided to take me to Kits Beach for a romp:

But, I guess all good times must come to an end........................... Another happy looking face?

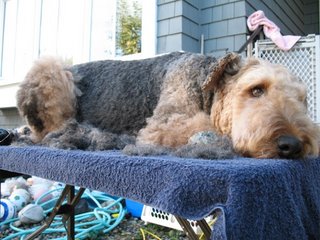
I will be Aire-drying tonight, until tomorrow.................. XOXO Miss Sunshade
DAY 2 - Scissor work (Friday, Sept.22.2006)
When I saw mum got out the grooming table today, I gave her the "OMG you're doing this AGAIN??" look. Much to my surprise, mum folded the table back down, and put all the grooming stuff in a bag. I was so happy because I thought my look worked and she had given up.
Well...not quite.... Mum packed everything into SunshadeMOBILE and drove to my favorite park. I guess she thought change of scenery would lighten me up, which it did....a little. We walked around the park first, then it was time to get to work.
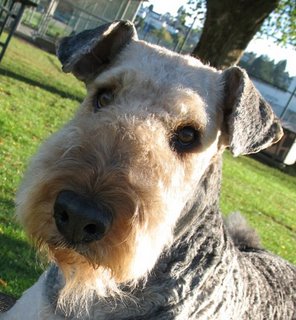
My ears and head were worked on first. Mum scissored the ragged edges of my ears so that they were neatly outlined. She then brushed the hair around my face out to the sides, so she could see how much hair needed to come off. A terrier's face should be rectangular looking, almost like a "brick". So that was the effect mum was trying to get. When mum scissored around my eye brows, she tried to make them so that they looked wedge shaped.

This is the finished head from the front view:

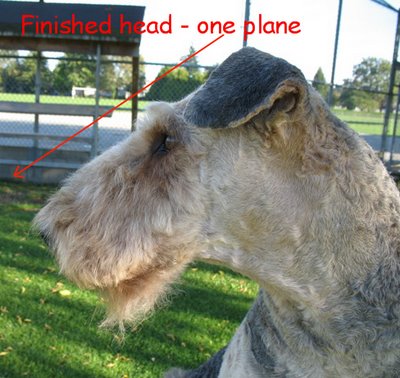
Looking at the face from the side, the hair on top of the muzzle should form a continuous line with the forehead, forming a plane. Mum combed the hair on top of the muzzle "up" to see how much hair she had to take off:
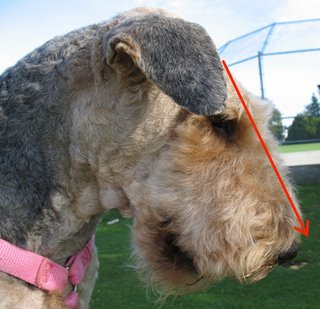
One plane (excluding eye brows):
Next, mum took out the dremel and dremelled my nails. I prefer the dremel to nail clippers because it is more comfortable, and I am less likely to bleed. My nails are black, making it very difficult to see where the quicks end. So mum feels more comfortable when she uses the dremel to shorten my nails a bit at a time.
It is important to trim the nails before starting scissoring of the legs. Once the nails are shortened, mum can scissor the hair around my paw, which then sets the mark for how long you want the hair on the rest of the leg to be. Mum tries to make the legs barrel like.
Un-trimmed leg:

Trimmed feet, now mum could see how much hair needed to come off the legs:

Finished left leg, un-trimmed right leg:

Mum finished up my other leg and let me off the table for a break before starting on my hind legs. I was a bit bewildered when mum told me I could go play..............

As soon as I was off the table, I started SMILING right away!!

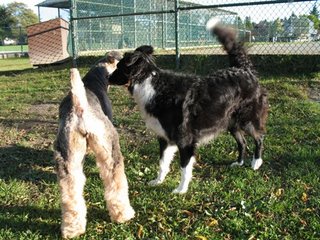
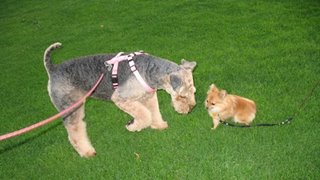
I met a Border Collie friend and we played for while.
After my break, mum started to work on my hind legs. The insides of the hind legs should form two straight lines when you look at them from the back:

The left leg was finished in the photo, right leg un-touched:

Mum also scissored and blended the furnishings on my outer thighs, unfortunately, she forgot to take photos of them..........
Lastly, my underline was trimmed - from the elbow up to the belly, or belly down to the elbow:
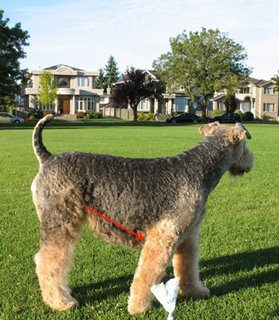
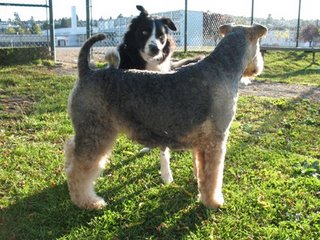
THE FINISHING PRODUCT!!
It is very rare for me to stack this well, mum was lucky to have caught the picture before I ran off after a dog.........

Before going home, mum and I went for another walk around the park. We met a little dog who I adored, but she wasn't too sure about me being so big, so mum had to leash me up......

Mum had just started grooming me herself back in June, so her techniques are far from perfect, and she still makes a lot of mistakes everytime. Please visit my previous post for more grooming information from breeders and professionals: